check php.ini file.
set short_open_tag = On

This Domain is for sale.
check php.ini file.
set short_open_tag = On
From: https://blog.csdn.net/Zed__H/article/details/121412938
vi /etc/yum.repos.d/CentOS-Base.repo
/failovermethod
将所有failovermethod=priority注释掉。
如果是其他repo,同样的处理办法。
Install PHP from remi
I want to install php-zip, command below
yum –enablerepo=remi install -y php-zip
From:https://toggen.com.au/it-tips/how-to-enable-ziparchive-on-php-7-4/
Find the extension version you want to install

| 12345678910 | # install apt-get install php7.4-zip # enable itphpenmod -v 7.4 zip # check it is enabled php7.4 -i | grep -i zip# restart any services such as php7.4-fpm.service to pick up the changesystemctl restart php7.4-fpm.service |

| 12 | yum install php-zip# restart Apache or php-fpm |
This is on CentOS Linux release 7.7.1908 (Core)
You will know you have it installed properly when you run the following code and it returns true?
| 123 | <?php// enter this in a file such as phpzip.phpvar_dump(class_exists('ZipArchive')); |
| 12 | php phpzip.phpbool(true) |
On CentOS using the remi-php74 repository it add a 40-zip.ini file into /etc/php.d/ with the contents of
| 12 | ; Enable ZIP extension moduleextension=zip.so |
from:https://blog.csdn.net/zsy16111/article/details/124427715
下载composer.phar文件
| 1 | curl -sS https://getcomposer.org/installer | php |
将composer.phar移动到环境变量中并且更名为composer
| 1 | mv composer.phar /usr/local/bin/composer |
使用国内镜像
| 1 | composer config -g repo.packagist composer https://packagist.phpcomposer.com |
| 1 | composer -v |
From:https://blog.csdn.net/qq_59536202/article/details/125053130
安装apache服务
yum install httpd
开启apache服务
systemctl start httpd
设为开机自启动
systemctl enable httpd
接下来安装php
yum install -y epel-release
rpm -ivh http://rpms.famillecollet.com/enterprise/remi-release-7.rpm
yum –enablerepo=remi install -y php74-php
yum –enablerepo=remi install -y php74-php php74-php-gd php74-php-xml php74-php-sockets php74-php-session php74-php-snmp php74-php-mysql
yum install -y php74-php-fpm
运行并查看版本
php74 -v
添加开机自启动
systemctl enable php74-php-fpm
链接php文件
ln -s /opt/remi/php74/root/usr/bin/php /usr/bin/php
配置文件路径
vi /etc/opt/remi/php74/php.ini
memory_limit = 512M
安装wget
yum install wget
wget http://dev.mysql.com/get/mysql57-community-release-el7-9.noarch.rpm
rpm -ivh mysql57-community-release-el7-9.noarch.rpm
安装MySQL
yum install -y –nogpgcheck mysql-community-server
启动MySQL
systemctl start mysqld
查找默认密码
grep ‘temporary password’ /var/log/mysqld.log
冒号后面的就是密码
拿到登录密码登录mysql
修改密码 刷新权限
开启mysql远程访问并允许连接
use mysql;
更改host并刷新权限
在关闭防火墙的状态下,现在使用navicat工具就可以连接上centos的mysql了
如果有防火墙,开放3306端口
firewall-cmd –zone=public –add-port=3306/tcp –permanent
更新防火墙规则
firewall-cmd –reload
安装完毕
git was not found, check that it is installed and in your PATH env.
Two methods:
1, sudo yum install git
2,
composer提示
Cloning failed using an ssh key for authentication, enter your GitHub credentials to access private
然后放到auth.json文件里(文件须有写入的权限)
    "github-oauth": {
        "github.com": "这里填token"},
保存就可以了。
也可以用第二种方法:composer config –global –auth github-oauth.github.com token系列号
You can also add it manually later by using "composer config --global --auth github-oauth.github.com <token>"
看看auth.json文件是不是变了
再看看composer安装是不是已经可以了
From:https://www.cnblogs.com/huanhang/p/14781986.html
From: https://blog.csdn.net/weixin_32938207/article/details/115172657
首先,进入php源码包ext目录,再进入imap目录。
[root@localhost ~]# cd imap/
[root@localhost imap]# phpize

再找到php-config路径
[root@localhost imap]# find / -name php-config

进行编译
[root@localhost
imap]# ./configure –with-php-config=/usr/local/php/bin/php-config
–with-kerberos –with-imap –with-imap-ssl –with-libdir=lib64
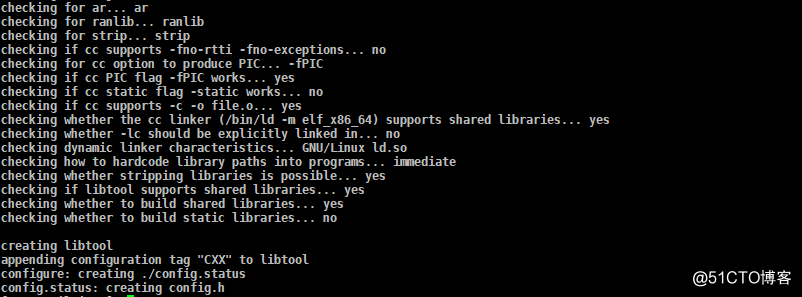
发现报错,如图

遇到这种报错,我要就需要安装 libc-client-devel 依赖。
[root@localhost imap]# yum -y install libc-client-devel
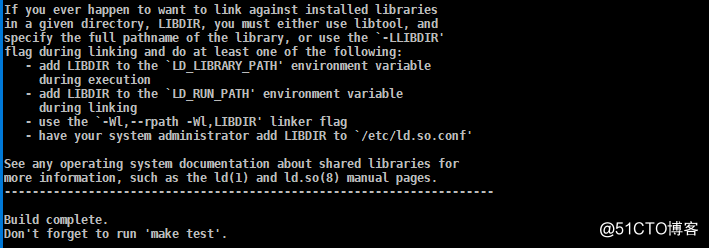
安装完成后,在进行编译,顺利通过,如图

再进行make、make install
[root@localhost imap]# make

[root@localhost imap]# make install

到这里,安装完成,然后编辑php.ini配置文件
[root@localhost imap]# vim /usr/local/php/etc/php.ini
再最后,加入如下三行后,重启apache、或者nginx服务
[imap]
extension_dir
=
/usr/local/php/lib/php/extensions/no-debug-non-zts-20170718/
注意:这里的路径要根据make install 后的结果填写,不要照抄
extension = imap.so
[root@localhost imap]# service httpd restart 或者 systemctl restart httpd
或者
[root@localhost imap]# service nginx restart 或者 systemctl restart nginx
两种不同的重启方式,使用哪一种,取决于安装方式,编译安装,使用前者,yum安装使用后者
重启完成之后,我们进行验证。
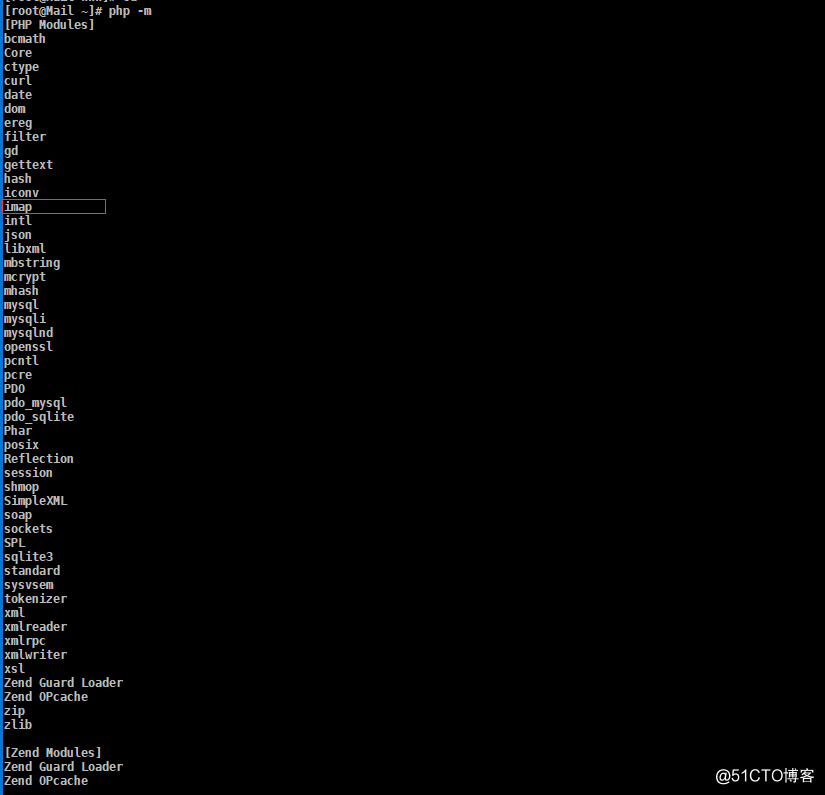
打开 phpinfo 网页,或是使用 php -m 查看


如果有上图中所示内容,说明 php 的 iamp 扩展安装成功,否则,请检查各项配置。
Centos:
yum install m4
yum install autoconf
From:https://www.jianshu.com/p/65527f186bd7
su -
[root@localhost ~]# wget -i -c http://dev.mysql.com/get/mysql57-community-release-el7-10.noarch.rpm
使用上面的命令就直接下载了安装用的Yum Repository,大概25KB的样子,然后就可以直接yum安装了。
[root@localhost ~]# yum -y install mysql57-community-release-el7-10.noarch.rpm
[root@localhost ~]# yum -y install mysql-community-server
此处碰到报错:All matches were filtered out by modular filtering for argument: mysql-community-server
解决方法:先执行 yum module disable mysql 再执行 yum install mysql-community-server
4.1 启动数据库:[root@localhost ~]# systemctl start mysqld.service
4.2 查看MySQL运行状态:[root@localhost ~]# systemctl status mysqld.service
4.3 此时MySQL已经开始正常运行,不过要想进入MySQL还得先找出此时root用户的密码,通过如下命令可以在日志文件中找出密码:[root@localhost ~]# grep "password" /var/log/mysqld.log
root密码
4.4 进入数据库:[root@localhost ~]# mysql -uroot -p
输入初始密码(上面图片绿框中),此时不能做任何事情,因为MySQL默认必须修改密码之后才能操作数据库:mysql> ALTER USER 'root'@'localhost' IDENTIFIED BY 'new password';
其中‘new password’替换成你要设置的密码,注意:密码设置必须要大小写字母数字和特殊符号(,/’;:等),不然不能配置成功
执行以下命令开启远程访问限制(注意:下面命令开启的IP是 192.168.0.1,如要开启所有的,用%代替IP):
mysql> grant all privileges on *.* to 'root'@'192.168.0.1' identified by 'password' with grant option;
刷新权限:mysql> flush privileges;
退出数据库:mysql> exit
添加mysql端口3306和Tomcat端口8080
[root@localhost ~]# firewall-cmd --zone=public --add-port=3306/tcp --permanent
[root@localhost ~]# firewall-cmd --zone=public --add-port=8080/tcp --permanent
然后再重新载入
[root@localhost ~]# firewall-cmd --reload
首先重新登录mysql,然后输入status:
Server characterset: latin1
Db characterset: latin1
可以看到,红框处不是utf-8
因此我们先退出mysql,然后再到、etc目录下的my.cnf文件下修改一下文件内容:
vi /etc/my.cnf
image.png
进入文件后,按 I 键进行编辑,新增下图四行代码:
[client]
default-character-set=utf8
[mysqld]
character-set-server=utf8
collation-server=utf8_general_ci
新增完,先按Esc键,然后按Shift + :键,输入wq,按Enter键
Tips:新增的代码中一个空格也不要有
mysql -h 192.168.0.124 -P 3306 -u root -p