
Word
YoastSEO sitemap_index.xml 404 Not Found
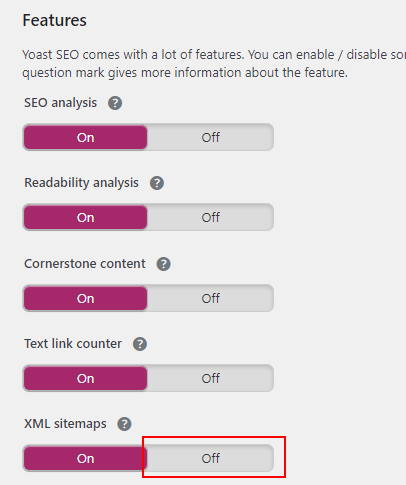
1.Close YoastSEO sitemap
2.edit .htaccess file
# BEGIN WordPress
# The directives (lines) between "BEGIN WordPress" and "END WordPress" are
# dynamically generated, and should only be modified via WordPress filters.
# Any changes to the directives between these markers will be overwritten.
# Yoast SEO - XML Sitemap Rewrite Fix

RewriteEngine On

RewriteBase /

RewriteRule ^sitemap_index.xml$ /index.php?sitemap=1 [L]

RewriteRule ^locations.kml$ /index.php?sitemap=wpseo_local_kml [L]

RewriteRule ^geo_sitemap.xml$ /index.php?sitemap=geo [L]

RewriteRule ^([^/]+?)-sitemap([0-9]+)?.xml$ /index.php?sitemap=$1&sitemap_n=$2 [L]

RewriteRule ^([a-z]+)?-?sitemap.xsl$ /index.php?yoast-sitemap-xsl=$1 [L]

# END WordPress
3. open YoastSEO sitemap
Publishing failed. You are probably offline.
The reason for my problem is that the wordpress addresses and site address are not the same, just change them to the same. The wordpress works normal. The following is a relatively good article in the solution process, which is collected for reference(https://www.wpbeginner.com/wp-tutorials/how-to-fix-wordpress-updating-failed-publishing-failed-error/).
What Causes Updating Failed or Publishing Failed Error in WordPress?
Failure to communicate with the WordPress REST API causes the ‘Updating Failed’ or ‘Publishing Failed’ error in WordPress.

Basically, WordPress sometimes uses a set of APIs (programming methods) called ‘REST API’ to send and receive requests to the WordPress database.
If it fails to send and receive those requests, then some parts of your WordPress website may not be able to function. This includes the WordPress block editor, which uses the API to send update and publish requests to WordPress.
Why WordPress is Unable to use REST API?
Now you might be wondering, that if I didn’t make any changes to my website, then why did the REST API stop working on its own?
There are a number of scenarios that may prevent WordPress from using the REST API. For example, you may not be connected to the internet or have lost connectivity.
Other reasons may be a little more complicated. For instance, you may have accidentally changed the site URL, a WordPress plugin may be causing the issue, or a third-party service may be blocking the API calls.
That being said, let’s take a look at how to troubleshoot and fix the WordPress updating failed error.
Step 1. Check Your Internet Connection and Site URL
The most common cause for updating failed error in WordPress is losing the WiFi connection. If your computer loses the internet connection as you are writing a blog post, then WordPress will fail to save your changes.
Make sure you are connected to the internet by visiting other websites in a new browser tab.
If your internet is working fine, then the next thing you would want to check is your WordPress site URL setting.
Simply go to Settings » General page and make sure that the Site Address and WordPress Address options are correct. For most websites, you should have the same URLs in both fields.

If your site URL settings look ok, and you are connected to the internet, then you can move on to further troubleshooting.
Step 2. Check REST API Status Using WordPress Site Health
WordPress comes with a built-in site health tool, which shows important information about your site’s security and performance.
Simply go to the Tools » Site Health page to view the report. If REST API is not working, then you will see it under recommended improvements as ‘The REST API encountered an unexpected result’.

It may also show you some debugging information which may explain what happened when WordPress made the REST API call. Studying this may give you some clue on which plugin or third party service may be causing the issue.
However, if it doesn’t give you any clue, then you can move on to the next step.
Step 3. Disable All Your WordPress Plugins
If a WordPress plugin is causing the REST API to misbehave, then the easiest way to find it out is by deactivating all your WordPress plugins.
You can go to the Plugins » Installed Plugins page and check the box to select all plugins. After that, use the Bulk Actions drop down to deactivate all plugins.

After that, you can go to the post edit screen and try to update. If the Updating Failed error disappears, then this means that one of your plugins was causing the issue.
You can now start activating your WordPress plugins one at a time and try to reproduce the error. Once you find the plugin causing the issue, you can seek support from plugin author or find an alternative plugin.
On the other hand, if disabling all WordPress plugins didn’t make the error go away, then continue to the next step.
Step 4. Check Website Firewall Service
If you are using a website firewall service like Sucuri or Cloudflare, then there is a chance that these services may block REST API requests.
This could happen if their firewall filters consider your IP address to be suspicious. They may also block REST API requests if your website is under an on going DDOS attack.
If you are using Cloudflare, then you can temporarily disable Cloudflare to see if this resolves your issue.
Normally, you’ll find Cloudflare settings under Domains section of your hosting dashboard. Bluehost users can find under My Sites » Manage » Performance tab.

If you are using Sucuri, then you can reach out to their support team, and they can whitelist your IP address or let you know what’s causing the issue.
Plugins and Firewall services are the most common cause of the updating failed error. However, if you are still seeing the error, then there are a few more things you can do.
Step 5. Enable and Review WordPress Debug Log
WordPress comes with built-in feature to keep a log of all WordPress errors. It does not log the REST API errors, but it will help you see if there are some other issues that may be causing the error.
Simply add the following lines to your wp-config.php file.
| 1234567 | // Change WP_DEBUG to true define( 'WP_DEBUG', true ); // Keep a log of WordPress errors define( 'WP_DEBUG_LOG', true ); |
Don’t forget to save your changes and upload the file back to your server. You can now try to publish or update a post in WordPress to reproduce the error.
After that, you can connect to your WordPress hosting account using an FTP client and go to /wp-content/ folder. From here, you can download the debug.log file to your computer.

You can open the debug file in a plain text editor like Notepad. It may contain a few errors, warnings, or notices caught by WordPress as you worked on your site or a user visited it.

If you see something that points you to a plugin or theme file, then this can be a useful hint. You can then mention this error when asking for support on WordPress.org forums or from your hosting provider.
Step 6. Temporarily Switch to the Classic WordPress Editor
A temporary solution to this error is to enable the classic editor. It is the old WordPress editor that does not rely on REST API to update and publish content.
You can enable it by simply installing and activating the Classic Editor plugin. For more details, see our step by step guide on how to enable the classic editor in WordPress.
Upon activation, you can simply edit the post you were working on. You would be able to save and publish it without seeing the updating failed or publishing failed error in WordPress.

Final Step: Ask for Support
If all else fails, then you may need to ask for support. You can start by directly contacting your hosting provider. They do have access to server logs and additional tools. It could also be caused by a misconfigured server or glitch at their end.
You can also seek help on WordPress.org forums or WPBeginner Facebook Group where other experts and users can help you fix the error.
For more details, see our article on how to properly ask for WordPress support and get it.
We hope this article helped you fix the WordPress updating failed or publishing failed error. You may also want to bookmark our complete guide on the most common WordPress errors and how to fix them.
WordPress网站出现Error establishing a database connection原因及解决方法
WordPress网站出现Error establishing a database connection(建立数据库连接时出错),重启服务器或者用service mysqld restart命令(MySQL数据库)或者systemctl restart mariadb.service命令(MariaDB数据库)可以暂时解决问题,过一段时间还会出现。
原文链接:https://blog.csdn.net/qq_35624642/article/details/89975968
阿里云轻量应用服务器wordpress升级php步骤
1.首先更新依赖包。
yum -y update
2.安装依赖包
yum -y install libxml2 libxml2-devel openssl openssl-devel bzip2 bzip2-devel libcurl libcurl-devel libjpeg libjpeg-devel libpng libpng-devel freetype freetype-devel gmp gmp-devel libmcrypt libmcrypt-devel readline readline-devel libxslt libxslt-devel zlib zlib-devel glibc glibc-devel glib2 glib2-devel ncurses curl gdbm-devel db4-devel libXpm-devel libX11-devel gd-devel gmp-devel expat-devel xmlrpc-c xmlrpc-c-devel libicu-devel libmcrypt-devel libmemcached-devel libzip gcc-c++

yum -y install sqlit3-devel
configure时检测时如果遇到缺少包,一般是缺少对应的devel包,如上安装sqlite-devel一样处理。
3.转到 /usr/local/src 目录,下载php7.3.5
cd /usr/local/src
wget https://www.php.net/distributions/php-7.3.5.tar.gz
4.解压安装包,并进入目录
tar -zxvf php-7.3.5.tar.gz
cd php-7.3.5
5.添加用户和组
groupadd www
useradd -g www www
6.开始编译
./configure --prefix=/usr/local/php --with-fpm-user=www --with-fpm-group=www --with-curl --with-freetype-dir --with-gd --with-gettext --with-iconv-dir --with-kerberos --with-libdir=lib64 --with-libxml-dir --with-mysqli --with-openssl --with-pcre-regex --with-pdo-mysql --with-pdo-sqlite --with-pear --with-png-dir --with-jpeg-dir --with-xmlrpc --with-xsl --with-zlib --with-bz2 --with-mhash --enable-fpm --enable-bcmath --enable-libxml --enable-inline-optimization --enable-mbregex --enable-mbstring --enable-opcache --enable-pcntl --enable-shmop --enable-soap --enable-sockets --enable-sysvsem --enable-sysvshm --enable-xml --enable-zip --enable-fpm
这里会提示 configure: error: Please reinstall the libzip distribution,我们需要移除libzip,手动安装最新版本
7.安装libzip
(1)先安装cmake(在阿里云centos不需要这一步)
cd /usr/local/src
wget https://github.com/Kitware/CMake/releases/download/v3.14.3/cmake-3.14.3.tar.gz
tar -zxvf cmake-3.14.3.tar.gz
cd cmake-3.14.3
./bootstrap
make && make install
(2)再编译安装libzip(在阿里云centos不需要这一步)
yum remove libzip -y
cd /usr/local/src
wget https://libzip.org/download/libzip-1.5.2.tar.gz
tar -zxvf libzip-1.5.2.tar.gz
cd libzip-1.5.2
mkdir build
cd build
cmake ..
make && make install
(3)执行以下命令
vi /etc/ld.so.conf
添加如下几行
/usr/local/lib64
/usr/local/lib
/usr/lib
/usr/lib64
保存退出
ldconfig -v # 使之生效
- 再次编译PHP7.3
make && make install
9.编译完成后,添加环境变量
vi /etc/profile
PATH=$PATH:/usr/local/php/bin
export PATH
刷新环境变量
source /etc/profile
10.配置文件
将启动脚本复制到init.d中。
cp /usr/local/src/php-7.3.5/sapi/fpm/init.d.php-fpm /etc/init.d/php-fpm73
给启动脚本加上执行权限
chmod +x /etc/init.d/php-fpm73
将默认配置文件复制为.conf文件
cp /usr/local/php/etc/php-fpm.conf.default /usr/local/php/etc/php-fpm.conf
cp /usr/local/php/etc/php-fpm.d/www.conf.default /usr/local/php/etc/php-fpm.d/www.conf
添加pool的配置
cat << EOF > /usr/local/php/etc/php-fpm.d/www.conf
[www]
listen = /home/www/logs/php73-fpm.sock
listen.mode = 0666
user = www
group = www
pm = dynamic
pm.max_children = 128
pm.start_servers = 5
pm.min_spare_servers = 5
pm.max_spare_servers = 15
pm.max_requests = 300
rlimit_files = 1024
slowlog = /home/www/logs/php73-fpm-slow.log
EOF
11.修改apache
镜像中默认是用的php-fpm,使用的是socket方式的监听,Apache对应配置文件/usr/local/apache/conf/httpd.conf
修改指定位置为:
ProxyPassMatch ^/(..php(/.)?)$ unix:/home/www/logs/php73-fpm.sock|fcgi://127.0.0.1/home/www/htdocs
12.重启服务
停止旧版本的PHP(实际不停止也不影响,停止可以减少一些系统资源占用)
/etc/init.d/php-fpm stop
启动新版PHP-FPM
/etc/init.d/php-fpm73 start
启动报错请修改文件名
修改/usr/local/php/etc/php-fpm.conf.default为php-fpm.conf
重启apache
/etc/init.d/apachectl restart
修改自启动
chkconfig --del php-fpm
chkconfig --add php73-fpm
参考https://blog.csdn.net/qq_43701912/article/details/107020920,中间根据个人情况进行修改。
virtual memory exhausted: Cannot allocate memory
一、问题
当安装虚拟机时系统时没有设置swap大小或设置内存太小,编译程序会出现virtual memory exhausted: Cannot allocate memory的问题,可以用swap扩展内存的方法。
二、解决方法
在执行free -m的是时候提示Cannot allocate memory:(swap文件可以放在自己喜欢的位置如/var/swap)
[root@Byrd byrd]# free -m
total used free shared buffers cached
Mem: 512 108 403 0 0 28
-/+ buffers/cache: 79 432
Swap: 0 0 0
[root@Byrd ~]# mkdir /opt/images/
[root@Byrd ~]# rm -rf /opt/images/swap
[root@Byrd ~]# dd if=/dev/zero of=/opt/images/swap bs=1024 count=2048000
2048000+0 records in
2048000+0 records out
2097152000 bytes (2.1 GB) copied, 82.7509 s, 25.3 MB/s
[root@Byrd ~]# mkswap /opt/images/swap
mkswap: /opt/images/swap: warning: don't erase bootbits sectors
on whole disk. Use -f to force.
Setting up swapspace version 1, size = 2047996 KiB
no label, UUID=59daeabb-d0c5-46b6-bf52-465e6b05eb0b
[root@hz mnt]# swapon /opt/images/swap
[root@hz mnt]# free -m
total used free shared buffers cached
Mem: 488 481 7 0 6 417
-/+ buffers/cache: 57 431
Swap: 999 0 999
内存太小,增加内存可以解决。
使用完毕后可以关掉swap:
[root@hz mnt]# swapoff swap
[root@hz mnt]# rm -f /opt/images/swap
swap文件也可以不删除,留着以后使用,关键是你的虚拟机硬盘够用。
原文链接:https://blog.csdn.net/taiyang1987912/article/details/41695895/